A blog describing my journey painting and battling with a Warhammer Fantasy Battle Orc Army and a Warhammer 40k Dark Angels Army using the Army Painter dip.
Showing posts with label army painter. Show all posts
Friday, June 6, 2014
Hovering Vengeance
The second Ravenwing vehicle was painted with the same technique as the first one, however, I did learn a few things from the Nephalim. First, I was much more aggressive with the blue edging highlights. This is really what makes the model pop, and the best effect is achieved when all edges have an even blue tone. The bone highlight is what is used to bring up certain corners and give the model dynamism.
Otherwise, this was a very quick and enjoyable paint job. The cockpit instrumentation turned out really well and adds great detail to an otherwise fairly mono-chromatic model. And thanks to my experience with decals on the Devastators, I added the skull decal on the gunner without problems. Again, I had to score the decal to allow it to wrap around the shoulder pad.
Next up, Dark Angels go camping. Or rather scouting..
Sunday, May 25, 2014
Attacking with Bikes
This miniature taught me a valuable conversion lesson. No matter how seemingly trivial the change, always double check your results. I decided to make the bike a Raven Wing machine by adding two wings to the sides of the main bike armour. Super simple and adds a nice visual detail. I did not, however, remember about the driver. After the model was assembled and painted, I tried slotting the driver into his position and discovered that the wings block his hands from getting to the handlebars. Fortunately this was fixable by removing the lower portion of his backpack and gently nudging him in. Lesson learned: always double check the model after changing it.
The paint job was very simple, with the standard black armour and Army Dip to keep the model consistent with the rest of the force.
Next up, Raven Wing seeks vengeance..
Monday, May 19, 2014
You're a Devastator Now, Brother
This set of Devastators was painted with the usual dip method. The one new technique I tried was using decals for the Dark Angel shoulder pad insignia. As much as I enjoy playing around with the occasional free-hand design, I know that there is no way that I could do an acceptable job with the highly symmetrical and structured Angel Winged Sword. I am quite pleased with the final result! The one tip I picked up is that in order for the decal to adhere to the highly curved shoulder pad, it needs to be scored. Diagonal cuts create flaps, which allow the decal to wrap on itself, allowing it to become convex. The end result really does look painted on and I will certainly be using decals in the future.
Next up, we look to the skies..
Friday, February 7, 2014
The Razorback: Sword of Wrath
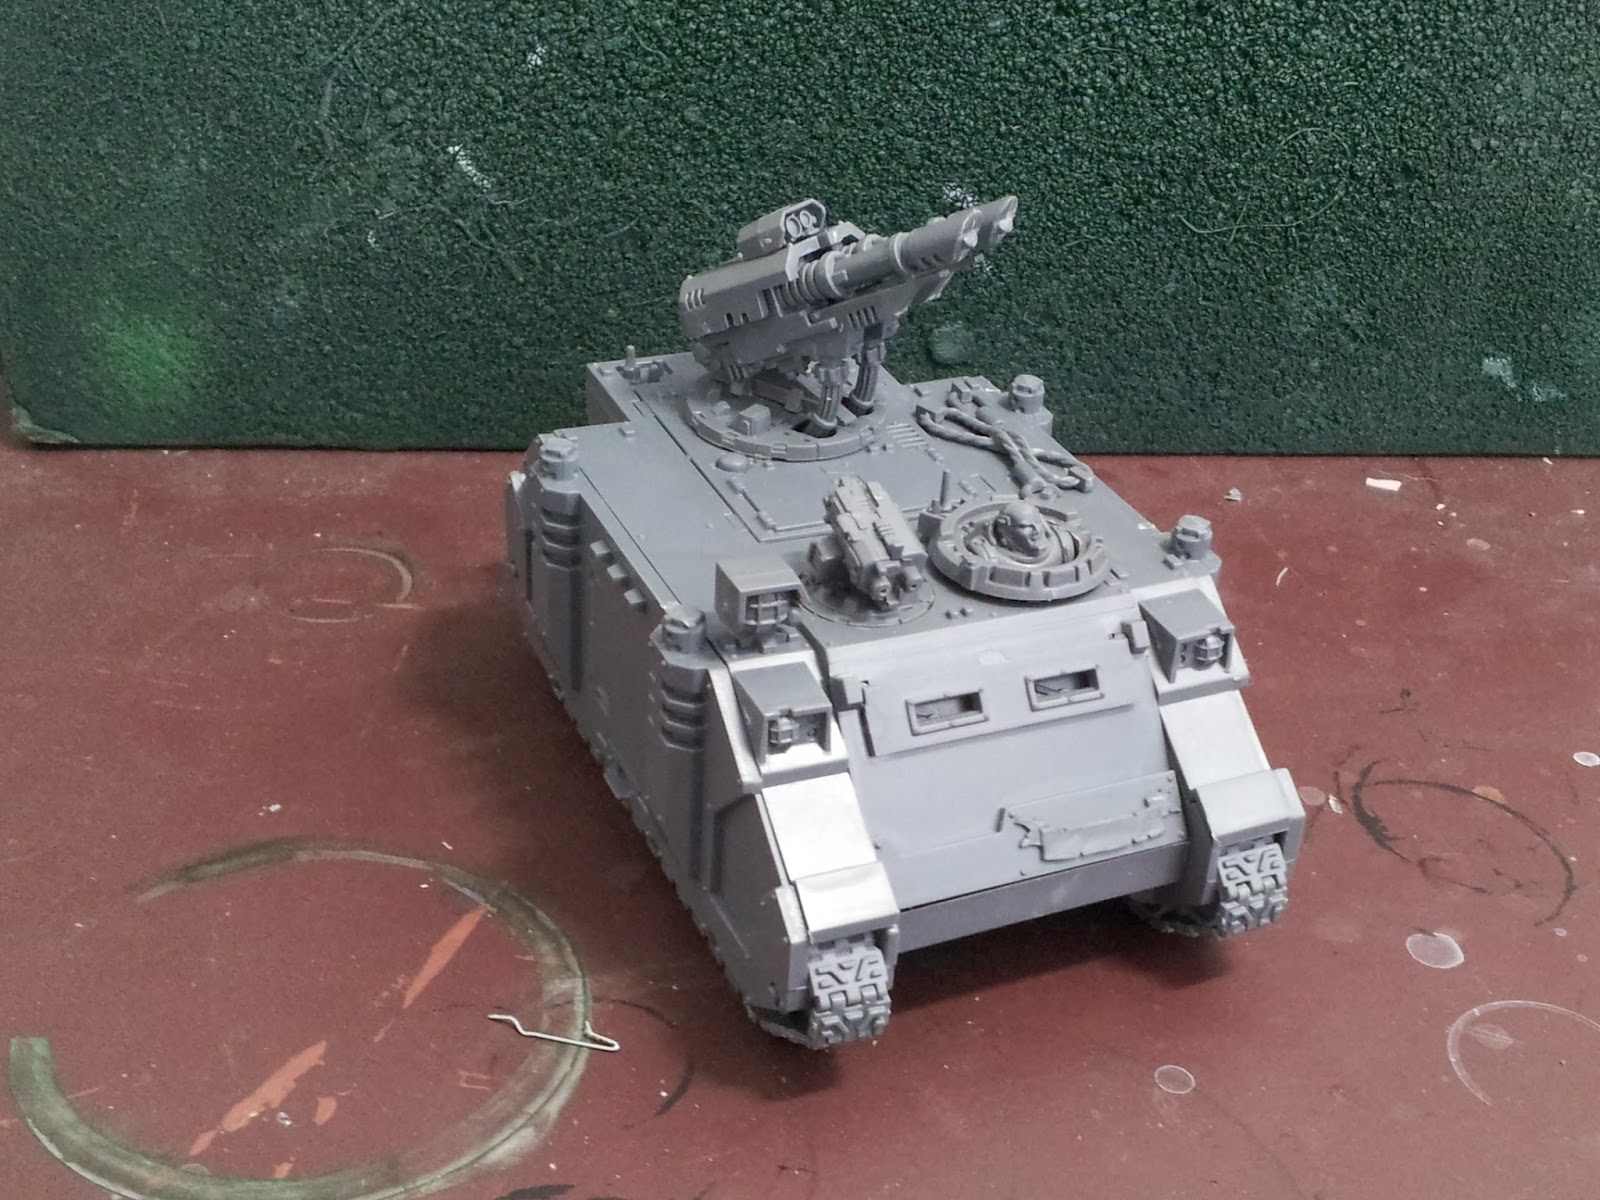
The Rarorback, which also doubles as a Rhino, is ready to go. My Dark Angels will finally not have to trudge across the battlefield on foot, but instead will be able to get around in style, inside Sword of Wrath's armoured hull.
The model was undecorated with Army Painter's excellent Angel Green undercoat, then painted with classic techniques including dry-brushing and blending. I also tried the new GW dark brown wash for the first time and was quite pleased with the results. It worked very well on the bone coloured scroll, the driver's face and the white angel ornament. For the text, the micron pen proved invaluable. If you like to do scroll work or writing, a 0.5mm pen is a must.
Up next, the 3rd company gets some needed air support!
Wednesday, November 6, 2013
The Siege of Castle Oldenhawk
After months of trying to starve the Empire garrison, mighty Orc Warboss Grumlock received bad news from his goblin scouts. The cunning 'ummies managed to get a runner past the Orc lines and a relief force was on its way. Just as well, he thought. He was tired of fighting like a cowardly elf, letting time and hunger do his killing. It was time to storm the castle, like Mork and Gork intended!
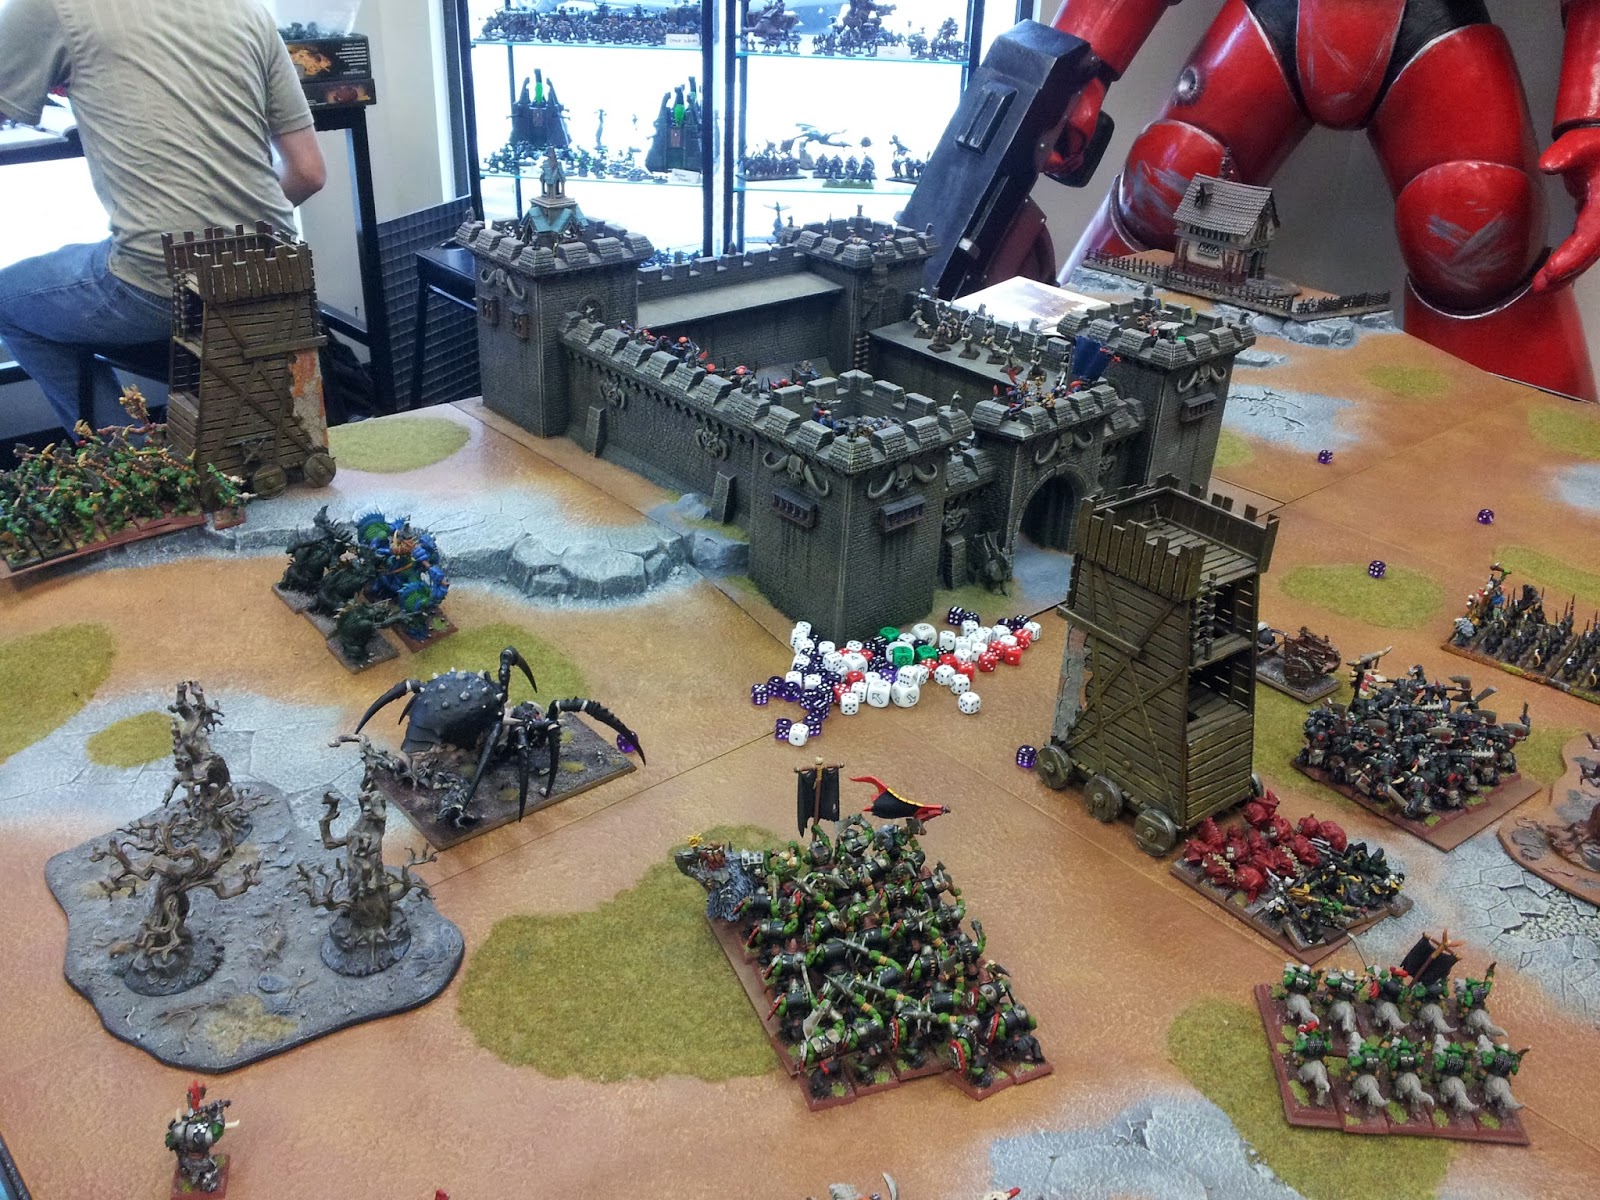
This was a massive 3000 pts Blood in the Badlands siege battle, hosted on the fantastic castle table at the Highgate Village Games Workshop.
After starvation and bombardment, the Empire defenders lost a large number of swordsmen and ended up with a breach of the main gate. Cavalry consisting of 20 knights and 10 pistolliers was kept in reserve. The Orcs concentrated on the South and West sides, with Savage Big'uns, supported by Trolls, storming a weakly defended North West tower. The bulk of the horde would storm the South gate and towers which held all of the strategic objectives. At least that was Grumlock's cunning plan..
Trouble for the Orcs started immediately when the Savage Orcs, unable to work the siege tower, spent the entire turn standing still. This confused the trolls, which ended up stumbling forward and taking archer fire from the battlements. The south wing advanced as intended with the Arachnarock and the squig herd crashing into the South West tower.
The Black Orcs, weighed down by their heavy armour, did not manage to make the assault on the first turn and the night goblins, led by a Shaman, were too cowardly to advance. The Empire mortar crew made the goblins pay for their inaction by dropping a shell in their midst, killing half of the unit.
Orcs were not to be out done by the human artillery. Crusher, the rock lobba, launched a perfectly placed stone, which not only destroyed the Hellblaster defending the South East tower, but it also crashed through the tower breaching it!
The squigs and the Arachnarock stormed the South West tower. Empire swordsmen, encouraged by their warrior priest and captains, mounted a desperate defence...
... but it proved to too weak to stop the frenzy of the squigs. The crazed fungus monsters crashed into the tower and pushed the defenders out. Castle Oldenhawk was breached!
Their victory would not last. All of the Empire captains, warrior priest and the generals charged into the tower and slew every single squig. The humans were in control of the castle walls again.
On the North Western flank, the Savage Orc big un's were still unable to operate the siege tower and spent another turn staring at the walls.
Disaster strikes the Orcs! The mighty Arachnarock was brought down by the heroes of the Empire. As its grotesque legs curled in twitching death spasms, the human defenders cheered and shouted praises to Sigmar.
On the North West flank, the Savage Big'uns abandoned the tower and got ready to storm the walls the old fashioned way, but they were unable to agree on who led the charge and spent the turn squabbling.
Grumlock knew that it was time for him to enter the fray and prepared to storm the hotly disputed South Western tower himself.
The Savage Orcs finally stormed the castle and easily beat back the defenders of the North Western tower. Castle Oldenhawk was breached again!
As the day was ending, Grumlock made one more desperate attempt to storm the deadly South Western tower. The Savage Orc Big'uns slaughtered through the defenders of the West Wall who bravely held back the River Trolls for the entire day, but they arrived at the South Western tower too late to help. Grumlock roared in anger as he was unable to break through the Empire defenders and was kept out of the castle. Even though the green tide has finally started sweeping around the walls, it was too late.
As the day ended, the Empire reinforcements finally arrived. It took the knights the entire game to make it on to the table and they were unable to make any difference in the outcome of the game. Castle Oldenhawk withstood the might of Warboss Grumlock on its own.
As night fell, Savage Orcs Big'uns were rampaging around the walls, but they were ultimately forced to withdraw. This was a solid victory to Empire.
A fantastic game! The Blood in the Badlands siege rules played very well. They are simple, but give the game an epic feel of a gigantic siege. And most importantly, the game was exciting and tense till the last die roll.
Lessons from the game:
This was a massive 3000 pts Blood in the Badlands siege battle, hosted on the fantastic castle table at the Highgate Village Games Workshop.
After starvation and bombardment, the Empire defenders lost a large number of swordsmen and ended up with a breach of the main gate. Cavalry consisting of 20 knights and 10 pistolliers was kept in reserve. The Orcs concentrated on the South and West sides, with Savage Big'uns, supported by Trolls, storming a weakly defended North West tower. The bulk of the horde would storm the South gate and towers which held all of the strategic objectives. At least that was Grumlock's cunning plan..
Trouble for the Orcs started immediately when the Savage Orcs, unable to work the siege tower, spent the entire turn standing still. This confused the trolls, which ended up stumbling forward and taking archer fire from the battlements. The south wing advanced as intended with the Arachnarock and the squig herd crashing into the South West tower.
The Black Orcs, weighed down by their heavy armour, did not manage to make the assault on the first turn and the night goblins, led by a Shaman, were too cowardly to advance. The Empire mortar crew made the goblins pay for their inaction by dropping a shell in their midst, killing half of the unit.
The squigs and the Arachnarock stormed the South West tower. Empire swordsmen, encouraged by their warrior priest and captains, mounted a desperate defence...
... but it proved to too weak to stop the frenzy of the squigs. The crazed fungus monsters crashed into the tower and pushed the defenders out. Castle Oldenhawk was breached!
Their victory would not last. All of the Empire captains, warrior priest and the generals charged into the tower and slew every single squig. The humans were in control of the castle walls again.
On the North Western flank, the Savage Orc big un's were still unable to operate the siege tower and spent another turn staring at the walls.
Disaster strikes the Orcs! The mighty Arachnarock was brought down by the heroes of the Empire. As its grotesque legs curled in twitching death spasms, the human defenders cheered and shouted praises to Sigmar.
On the North West flank, the Savage Big'uns abandoned the tower and got ready to storm the walls the old fashioned way, but they were unable to agree on who led the charge and spent the turn squabbling.
Grumlock knew that it was time for him to enter the fray and prepared to storm the hotly disputed South Western tower himself.
The Savage Orcs finally stormed the castle and easily beat back the defenders of the North Western tower. Castle Oldenhawk was breached again!
As the day was ending, Grumlock made one more desperate attempt to storm the deadly South Western tower. The Savage Orc Big'uns slaughtered through the defenders of the West Wall who bravely held back the River Trolls for the entire day, but they arrived at the South Western tower too late to help. Grumlock roared in anger as he was unable to break through the Empire defenders and was kept out of the castle. Even though the green tide has finally started sweeping around the walls, it was too late.
As the day ended, the Empire reinforcements finally arrived. It took the knights the entire game to make it on to the table and they were unable to make any difference in the outcome of the game. Castle Oldenhawk withstood the might of Warboss Grumlock on its own.
As night fell, Savage Orcs Big'uns were rampaging around the walls, but they were ultimately forced to withdraw. This was a solid victory to Empire.
A fantastic game! The Blood in the Badlands siege rules played very well. They are simple, but give the game an epic feel of a gigantic siege. And most importantly, the game was exciting and tense till the last die roll.
Lessons from the game:
- Squig herds are really cool. Will definitely pick some up.
- Never trust Savage Orcs to drive a siege tower. They just don't understand how wheels work.
- Never count on your reinforcements to show up, even if they are all mounted. Empire knights can sure take their time..
- Commit your troops early. Allowing the defenders the luxury of supporting combats from adjacent buildings is a huge mistake.
- Siege is awesome! Can't wait to play another one.
Sunday, August 11, 2013
Dancing with Skargog Skull 'ead
My Savage Ork Shaman is ready
As with all characters, I painted Skargog Skull 'ead with classic blend shading instead of dipping. I really enjoyed shading and blending the muscles and and cloth. The Savage Ork minis are quickly becoming some of my favourites to paint because they offer a great mix of large area shading and detail work. And of course, this sculpt has one of the most dynamic poses in the line. How often do you get to see a half-naked ork dancing?
I used the Micron pen on the skulls and I am thrilled with the results. It's hard to see in the pictures, but I was able to draw in some really great designs which bring the mini to life and add eye-catching detail.
Now that Skargog is ready, complete with the Shrunken Head hanging off his belt, he'll be joining my Savage Ork Mob and providing them some much needed protection!
As with all characters, I painted Skargog Skull 'ead with classic blend shading instead of dipping. I really enjoyed shading and blending the muscles and and cloth. The Savage Ork minis are quickly becoming some of my favourites to paint because they offer a great mix of large area shading and detail work. And of course, this sculpt has one of the most dynamic poses in the line. How often do you get to see a half-naked ork dancing?
I used the Micron pen on the skulls and I am thrilled with the results. It's hard to see in the pictures, but I was able to draw in some really great designs which bring the mini to life and add eye-catching detail.
Now that Skargog is ready, complete with the Shrunken Head hanging off his belt, he'll be joining my Savage Ork Mob and providing them some much needed protection!
Sunday, July 7, 2013
The Other Death Wing
The second squad of the Death Wing terminators has been completed. With this squad, I am finished all units of the starter box and now only have the Commander and Chaplain left before I can officially declare the starter box painted.
This second squad showed me the limitations and perils of the Army Dip. The dip became extra thick and it was very difficult to remove the excess. As a result, the whole squad came out looking a little muddy and I had to spend time re-painting and cleaning up the extra dark coat to bring back some of the original colour. Especially on the open sloping areas like the shoulders and back there was a distinct streaking effect. The final result is still very much solid table-quality, however, I am not happy with how the minis turned out.
I have thinned the dip with distilled turpentine for the next time. Hopefully it will work better.
What's next for the Dark Angels? I will get a couple of more games in and at this point the main problem I have is getting my Tactical Squads into the action. I think a Rhino or two are in order.
Tuesday, May 7, 2013
Heavy Footsteps
The army needed some heavy hitting so I decided to add a 40k classic: the Dreadnought. It's an iconic Space Marine vehicle and I chose to overlook their general fragility in this edition.
This is the first model that I magnetized and I am very happy with the results. I have now 4 options for my heavy walker, but I think that these two will be most common. The cheaper basic:
and the decked out heavy hitter:
I was a little apprehensive about using the Army Painter dip on a model this size, but the final results are not bad at all. The dip had the nice effect of giving the model a weathered look, which is great for vehicles. I spent a bit more time detailing and shading to bring out some highlights than I do on individual troopers and I'm quite happy with the result. Oh, and I used a Decal Softener from Flames of War. It really helped to blend the transfers into the armour. For a model this sized, I did not feel comfortable going freehand to paint the symbols and numbers.
I can't wait to see how this guy does in battle! Brother Serean has returned...
This is the first model that I magnetized and I am very happy with the results. I have now 4 options for my heavy walker, but I think that these two will be most common. The cheaper basic:
and the decked out heavy hitter:
I was a little apprehensive about using the Army Painter dip on a model this size, but the final results are not bad at all. The dip had the nice effect of giving the model a weathered look, which is great for vehicles. I spent a bit more time detailing and shading to bring out some highlights than I do on individual troopers and I'm quite happy with the result. Oh, and I used a Decal Softener from Flames of War. It really helped to blend the transfers into the armour. For a model this sized, I did not feel comfortable going freehand to paint the symbols and numbers.
I can't wait to see how this guy does in battle! Brother Serean has returned...
Saturday, April 13, 2013
On the Wings of Ravens
The dual Ravenwing squad is done and done.
I have to admit that I was wary of using the dip on a black armoured model, but the squad turned out rather well.
The one new technique I tried this time around is how to highlight black armour. I typically either went with dark gray to light gray dry-brush, or sometimes dark blue to white dry-brush, which works, but I the results were not satisfying. This time around, however, I tried medium blue and then bone to bring out the details. It worked better! The blue gives the models some colour and the bone highlights are softer than white. When combined with the wash, the black armour has some great depth, pigment and details. And the best part is that I was able to use gray on the tires, which made them stand out from the bikes. I will definitely use this in the future.
The army is coming together nicely. I can see the end of the Dark Vengeance double box.
Next up, I need a hero.
Wednesday, January 30, 2013
This Paint Job is Terminated...
Finally finished up my first batch of Deathwing Terminators. Br. Tremiel is ready to teleport into battle!
The dip worked very well with the bone base, which I expected and it also layered some nice depth on the white banner and parchment.
The banner gave me a chance to try simple free-handing of the Deathwing emblem, which came out rather well. I originally wanted to add some text, but ended up running out of space.
Two main lessons from this batch.
First, never ever use old primer. I do not know why I ignored this wisdom. The models ended up with a terrible, sandy texture which really obscured some finer detail on the robes and swords of the autogunner. Fortunately I was able to cover the damage and it's not visible on the finished models. But I was worried for a bit there.
Second, the P3 wet-palette is excellent for wet-blending. I only blended the power-sword, but this technique will be very useful on the character models.
Next up, my strike force gets some speed with a 6 bike Ravenwing squad.
The dip worked very well with the bone base, which I expected and it also layered some nice depth on the white banner and parchment.
The banner gave me a chance to try simple free-handing of the Deathwing emblem, which came out rather well. I originally wanted to add some text, but ended up running out of space.
Two main lessons from this batch.
First, never ever use old primer. I do not know why I ignored this wisdom. The models ended up with a terrible, sandy texture which really obscured some finer detail on the robes and swords of the autogunner. Fortunately I was able to cover the damage and it's not visible on the finished models. But I was worried for a bit there.
Second, the P3 wet-palette is excellent for wet-blending. I only blended the power-sword, but this technique will be very useful on the character models.
Next up, my strike force gets some speed with a 6 bike Ravenwing squad.
Saturday, January 12, 2013
Storm of Waaagh!
Gadagutz Sharptooth finally had a chance to try his horde out in a storm of magic game. We played 2000 points plus 500 points Storm of Magic bound monsters. My opponent graciously provided the four Fulcrums and the monsters, so all I had to bring were my Orcs.
The game was epic, chaotic and like any great game, it came down to the very last turn. This is exactly how Storm of Magic games should be.
Gadagutz's orcs were joined by a Lammasu, a Cockatrice and some spiders.
My opponent fielded goblins and brought in two goblin blocks, a big squig herd, two chariots, two bolt throwers, some squig hoppers and spider riders. His army was joined by a Chimera, a giant, Dark Emissary and an Arachnarock.
After deployment. You can see that the SoM deployment rules make a huge difference. The Squig herd and the Chimera are very close to my lines. This being my first SoM game, I did not realize just how much danger my troops were in, right from the get go.
Goblin first turn. No surprises there, the squigs and the Chimera charge Ironskull's Boyz, which also has my BSB. Ouch. And the Arachnarock takes on the Trolls. The boyz fold under the massive barrage, including a very big Thunderstomp and my BSB is off the board. The Trolls manage to wound the Arachnarock, but fail too many regeneration rolls and also flee.
The end of the game. The Lammasu survives the giant and defends his Fulcrum. Thank you, breath-weapon. Earlier on Ol' Gums, my Orc Shaman, was forced out of his Fulcrum and destroyed but Mooneye, the Goblin Great Shaman, survives waves of attackers defending a building. There is not a single Orc left on the field, and Gadagutz's army has been scattered to the four winds, but I hold one Fulcrum to my opponent's none.
Victory! (even if I have almost nothing left on the table to celebrate with...)
Overall I really enjoyed the SoM game. The extra rules really turn this into a very different game from standard WFHB affair. Fulcrums add a whole extra level of tactical game play and keep things interesting. Magic was powerful, but not as devastating as I feared. I will definitely want to play another SoM game in the future.
The game was epic, chaotic and like any great game, it came down to the very last turn. This is exactly how Storm of Magic games should be.
Gadagutz's orcs were joined by a Lammasu, a Cockatrice and some spiders.
My opponent fielded goblins and brought in two goblin blocks, a big squig herd, two chariots, two bolt throwers, some squig hoppers and spider riders. His army was joined by a Chimera, a giant, Dark Emissary and an Arachnarock.
After deployment. You can see that the SoM deployment rules make a huge difference. The Squig herd and the Chimera are very close to my lines. This being my first SoM game, I did not realize just how much danger my troops were in, right from the get go.
Goblin first turn. No surprises there, the squigs and the Chimera charge Ironskull's Boyz, which also has my BSB. Ouch. And the Arachnarock takes on the Trolls. The boyz fold under the massive barrage, including a very big Thunderstomp and my BSB is off the board. The Trolls manage to wound the Arachnarock, but fail too many regeneration rolls and also flee.
This being a SoM game, massive magic energies abound. The giant is teleported to my rear. Things are not looking good. But Gadagutz has pulled through worse!
Leftooth's Black Orcs hit the arachnarock in its flank and dispatch it soundly, but not before the giant spider eats Gadagutz! At this point, I have lost the BSB and the general. But.. this is a Storm of Magic game, so it's all about the Fulcrums.
Leftooth and his crew get double charged, including a rear charge by a giant! Things are looking mighty grim indeed, however, there's a pivotal battle happening in the back..
My Gigantic Spider has been steadily attacking and wounding the Dark Emissary in his Fulcrum. If I can get him out of the Fulcrum, this battle might be won yet.
I placed the Lammasu into one of the Fulcrums, the Dark Emissary teleports his Fulcrum away, but not quite far enough. The nibbly spider follows and eventually eats him! And with the other Fulcrum teleported closer to my line, the Lammasu is able to Duel and eventually kill the opposing Night Goblin Great shaman. This means I hold all the Fulcrums in the game. Victory may yet be mine.. if I can just hold on.
In the core battle, Leftooth is wiped out, but Madspittle and his Savage Orcs chop up the Chimera. The Giant turns around and storms the Lammasu. If he can't get him out of there, nothing else in the goblin army can..
The end of the game. The Lammasu survives the giant and defends his Fulcrum. Thank you, breath-weapon. Earlier on Ol' Gums, my Orc Shaman, was forced out of his Fulcrum and destroyed but Mooneye, the Goblin Great Shaman, survives waves of attackers defending a building. There is not a single Orc left on the field, and Gadagutz's army has been scattered to the four winds, but I hold one Fulcrum to my opponent's none.
Victory! (even if I have almost nothing left on the table to celebrate with...)
Overall I really enjoyed the SoM game. The extra rules really turn this into a very different game from standard WFHB affair. Fulcrums add a whole extra level of tactical game play and keep things interesting. Magic was powerful, but not as devastating as I feared. I will definitely want to play another SoM game in the future.
Friday, December 28, 2012
Brother Hesdiel's 2nd Tac, 3rd Co.
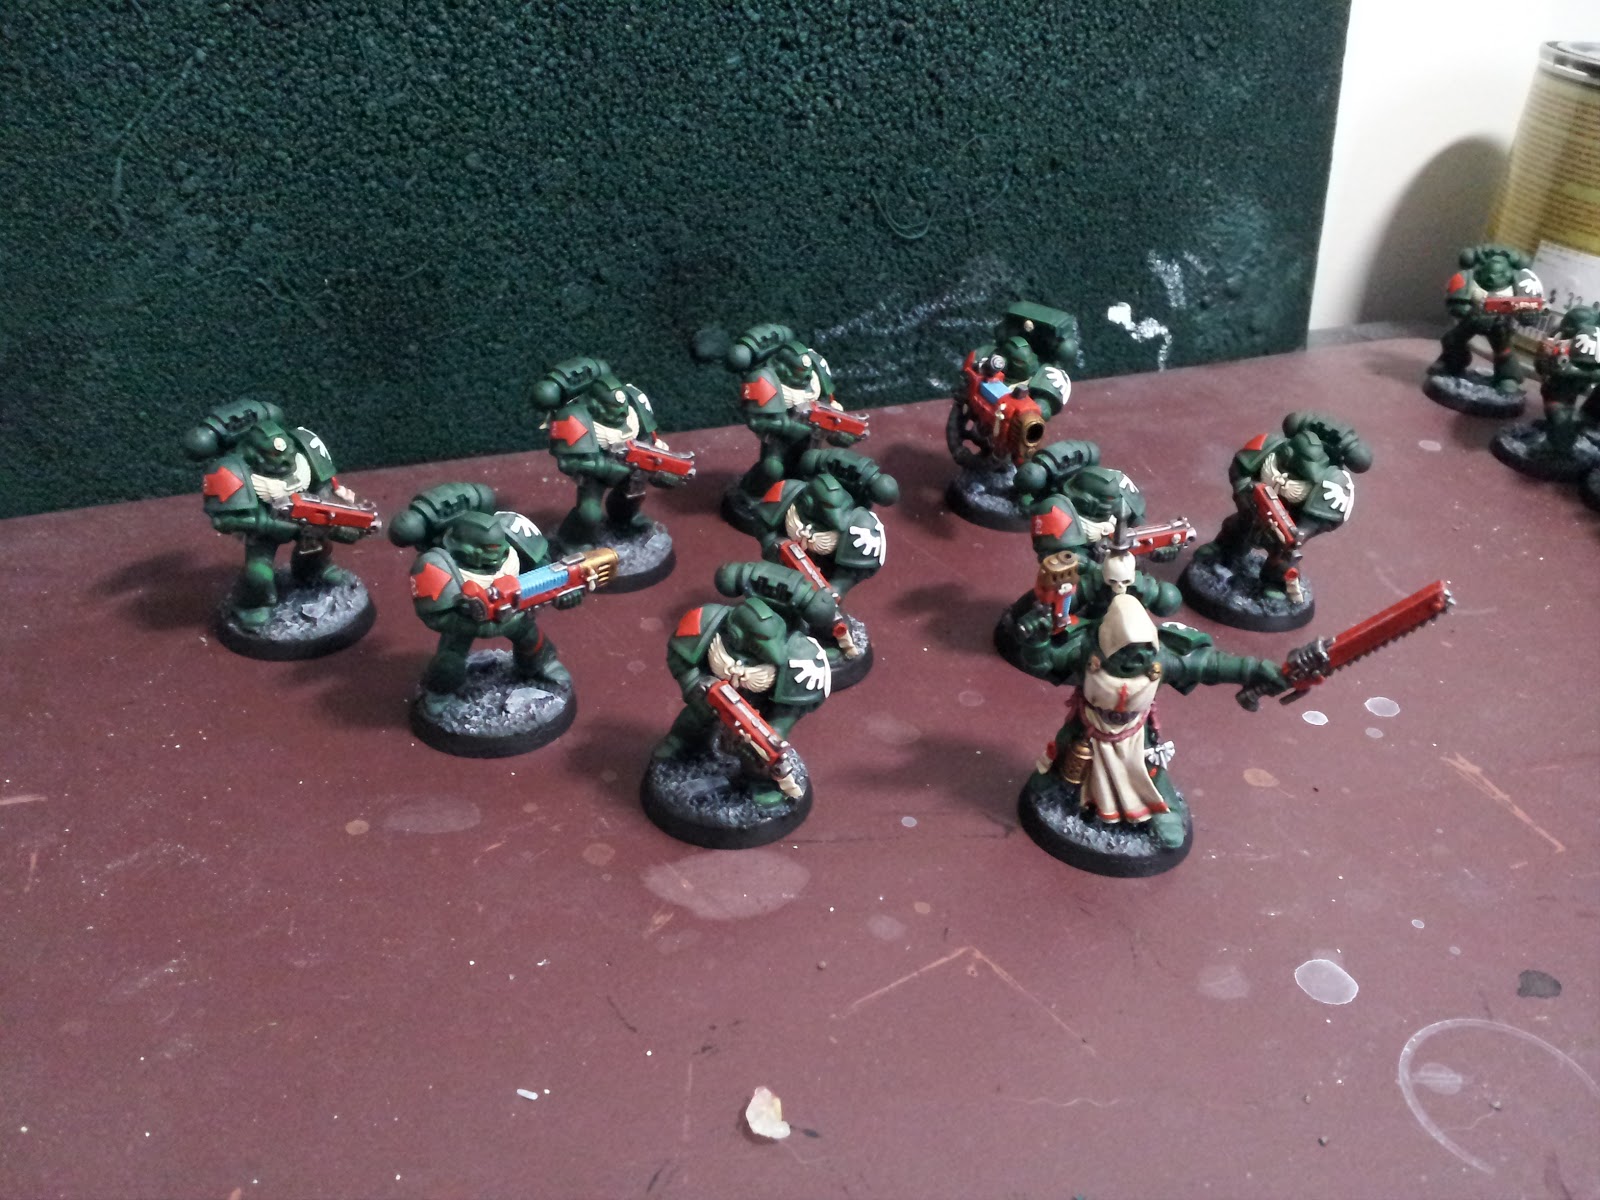
The second tactical squad of the 3rd Company is complete.
I used pretty much the same technique as with the first squad, with minor tweaks. This time around I spent more time highlighting each marine's power armour contours to bring out the shape. I then ended up going back to the 1st squad and adding those same highlights. Without them, the dipped green was just too flat looking.
The big differences were with my painting equipment. Two major improvements: new paint brush and the P3 Wet Palette.
I pained these guys mostly with a Winsor & Newton Minature Series 7 Nr. 3 brush. Yes, that brush does cost more than twice what a normal brush costs, however, so far I am very happy with the results. It provides a perfect balance between area coverage and clean lines.
I also tried using the Privateer Press P3 Wet Palette for the first time and I am very impressed. I think it is essential for anyone paining larger groups of figures with the same colour, because it makes the paint last forever on the palette. Especially if you have to custom blend a shade, having it dry on the palette within 10 minutes is very frustrating. With the wet palette, you can keep on painting and painting. One word of caution, it is very easy to get thin paints overly watery, so be careful when using thin colours.
With my core Troops done, it's time to move on to Elites. One squad of Deathwing is coming next.
Thursday, December 6, 2012
Brother Ramiel's 1st Tac, 3rd Co.
The 1st Tactical squad of the 3rd Company is complete.
For the rank and file Dark Angels I used a DA Green spray primer. Priming in the base colour is the fastest way to get squads painted.
Then I undercoated the guns, robes and insignia in white which allowed the red and bone colours to nicely stand out.
As always, it is critical to have all lines extremely clean so I took a bit longer fixing up all the little paint overruns.
For the metals, I used a single coat of silver or brass and washed with the P3 armour wash.
Given that this army is considerably darker than my Orcs, I switched to the Dark Tone of the Army Painter Quickshade. After the shade was applied, I sprayed matt varnish before adding highlights.
Two things I learned:
1) Red can be effectively highlighted with bone+red mixture. This was a pro-tip from a visiting painter at my local game store Strategies. (thanks!)
2) The Dark Tone still gets pretty much lost in the DA green armour so the effect is subtler than I would have liked. However with some highlighting the power-armour came out reasonably well.
3) Brother Ramiel's bald head is very shiny. I may have to touch it up with some hair effect...
The finished product is definitely good enough for the table! And with only 10 troops per squad, I can put in a bit more time than I did with my Orc grunts.
Next up: Brother Hesdiel's 2nd Tac, 3rd Co. squad.
Monday, December 3, 2012
The Descent Begins
It has happened. I picked up the Dark Vengeance box, exchanged the Chaos minis and doubled up on the Dark Angels. Fantasy Battles is still my number one game, however, I have been impressed with the 40k 6th rules. Fun, simple and with a massive following.
So as my orcs would say: 'Ere we go 'Ere we go!
- 2 Tactical squads
- 2 Deathwing Squads
- 2 small Raven wing squads (which can be combined into one big squad)
- Chapter Master
- Librarian
- Chaplain
This is not a competitive army but it is a great core of an army.
My plan is to paint both the Tacticals first, then a squad of Deathwing, then a character or two, then the bikes and finish with the last Deathwing squad.
Let the dipping begin!
Sunday, September 23, 2012
Mork wants ya!
The mighty Ol' Bones Orc Shaman is ready to rain down some Mork and Gork stomping on the enemy.
For this model I went back to traditional shading and highlighting given that it is a character. I am finding that the mix of Army Painter fast shading for all normal units and traditional blending and shading for the characters is a perfect mix. I can get a lot of troops painted quickly to a great Table Top standard and then take my time enjoying the detail and subtleties of the character models.
I love this sculpt. There is a sense of wisdom and experience emanating from this venerable Orc which is a great contrast to the bravado and fury typical of the other models. Plus the soft lines and well pronounced shading points make it very easy to paint.
I used multiple layers of lightness for the shading building up from a dark shade all the way to the highlight. Both bone and leather also received a chestnut wash to really bring out the detail.
With this character, 2000 points are complete. However, this is what I would call "weak" 2000 points because they rely on tooled-up characters to soak up the points. I will have to play a couple of games to see what I want to add to the army to create a more competitive 2000 point horde.
Monday, September 10, 2012
Oi, You Drive, I Shoot!
The goblin chariot has been one of my favorite models from the O&G line. More than the Orc chariot, there is a distinct charm to the sculpt and the wild abandon of the goblins.
The Army Painter dip worked very well for this model. Green and bone are the two best colours for AP dip shading so I am very happy with how the model turned out. I made one change to my process based on the tutorials on the Army Painter site which worked very nicely. I applied the dull-coat varnish right after dipping, but before adding detail. The dull coated surfaces are better for painting and detailing than glossy ones. I will continue to paint in this order going forward.
Next up, an Orc Shaman will deliver some Big Waaagh!
Sunday, August 12, 2012
Time to Go Bowling with a Mangler!
The Mangler Squig is ready to cause havoc!
With these larger models, the Army Painter dip is at the limit of what it can deliver. I am not completely pleased with how some of the larger recesses ended up looking, even though the overall effect is tabletop ready. This model will not win any competitions, but it will hopefully flatten some units.
I was pleasantly surprised by the GW yellow Base colour which I used on the Night Goblin hoods. A single layer of the base and a touch-up of bright yellow created a very nice and quick effect. This method of painting yellow rays on black is much quicker than the traditional method of painting the rays in white first and then covering with yellow. If you are still on the fence about the Base paint set, I can vouch for the yellow at least.
Next up, the Horde keeps marching on to the 2000 point mark. I have two more models to add to the mix and then the Horde will be unleashed.
Labels:
army painter,
Fine Cast,
Mangler Squig,
orc,
ork,
painting,
tabletop gaming,
warhammer,
whfb
Monday, May 21, 2012
Every Rock Lobba Has It's Day!
Sharptusk's 1500 point horde was ambushed by the Lizardmen while trying to cross a mountain pass. This was the first game with the full army which gave me a chance to check out the newly painted Trolls, the Black Orks and the BSB.
The setup was along the short edge to simulate the mountain pass my Orks were battling through. The Lizards were allowed to deploy their Stegadon as an Ambusher which meant that it would get a flank charge on some unfortunate unit.
I set up the Orks in a balanced line, with Skarsnik's Wolves making a fast advance on the right flank, Black Orks and the Boyz in the center with Sharptusk in the middle and Maddspittle's Savage Orks bringing the pain on the left flank. Crusher was safely tucked away behind the river.
First Turn saw the game changing play. Crusher the Rock Lobba landed a direct hit on the Slann Mage protected by the Temple Guard, who then failed his Look Out Sir roll, failed his ward save, took 6 wounds and exploded like bloated toad. That one, well placed rock took out the Lizard's only caster, BSB and general all in one go. Best shot of Crusher's career.
Both lines advance. The wolves harass the Salamander killing a handler on the Lizard's left flank. Vanguard makes Fast Cav really fast!
What followed next was a slaughter. The Savage Orks chase off the skinks and get charged by the Temple Guard who are crushed by bad rolls and frenzied green choppa wielding monsters. This collapses the Lizards right flank. On the Left flank, the Saurus charge the Black Orks and the Trolls while the Stegadon wanders onto the field in support and slams into the Black Ork flank.
Sharptusk turns his Boyz in support of the Black Orks, but between the Stegadon Impact Hits and Monstrous Stomp, they are wiped out to the Ork before the Boyz can join in. When they do, however, the Saurus do not stand a chance and are run down and destroyed.
Sharptusk chases the Saurus straight into the Stegadon flank and we call the game. With only the Stegadon remaining, the Lizards have no chance of victory. Sharptusk prevails!
Lessons Learned
Every Rock Lobber has its day. Crusher had one good hit the entire game before missing and misfiring, but that one hit was all I wanted from it.
Black Orks need to be at least 20 strong to be useful. With only 15, they just die too quickly and start losing attacks. The unit itself, however, is excellent. Armed to Da Teef is a fantastic rule.
Trolls are great support unit when backed by infantry. They stomped many a Saurus while the Black Orks held the line.
BSB is a must for Orks. Glad I pained one up.
Wolves are more fun than use. I love their speed and the annoyance factor, but at 100 points they just do not do enough. I am not sure how to play them next time. Perhaps a unit of 5 for pure throw-away distraction.
The setup was along the short edge to simulate the mountain pass my Orks were battling through. The Lizards were allowed to deploy their Stegadon as an Ambusher which meant that it would get a flank charge on some unfortunate unit.
I set up the Orks in a balanced line, with Skarsnik's Wolves making a fast advance on the right flank, Black Orks and the Boyz in the center with Sharptusk in the middle and Maddspittle's Savage Orks bringing the pain on the left flank. Crusher was safely tucked away behind the river.
First Turn saw the game changing play. Crusher the Rock Lobba landed a direct hit on the Slann Mage protected by the Temple Guard, who then failed his Look Out Sir roll, failed his ward save, took 6 wounds and exploded like bloated toad. That one, well placed rock took out the Lizard's only caster, BSB and general all in one go. Best shot of Crusher's career.
Both lines advance. The wolves harass the Salamander killing a handler on the Lizard's left flank. Vanguard makes Fast Cav really fast!
What followed next was a slaughter. The Savage Orks chase off the skinks and get charged by the Temple Guard who are crushed by bad rolls and frenzied green choppa wielding monsters. This collapses the Lizards right flank. On the Left flank, the Saurus charge the Black Orks and the Trolls while the Stegadon wanders onto the field in support and slams into the Black Ork flank.
Sharptusk turns his Boyz in support of the Black Orks, but between the Stegadon Impact Hits and Monstrous Stomp, they are wiped out to the Ork before the Boyz can join in. When they do, however, the Saurus do not stand a chance and are run down and destroyed.
Sharptusk chases the Saurus straight into the Stegadon flank and we call the game. With only the Stegadon remaining, the Lizards have no chance of victory. Sharptusk prevails!
Lessons Learned
Every Rock Lobber has its day. Crusher had one good hit the entire game before missing and misfiring, but that one hit was all I wanted from it.
Black Orks need to be at least 20 strong to be useful. With only 15, they just die too quickly and start losing attacks. The unit itself, however, is excellent. Armed to Da Teef is a fantastic rule.
Trolls are great support unit when backed by infantry. They stomped many a Saurus while the Black Orks held the line.
BSB is a must for Orks. Glad I pained one up.
Wolves are more fun than use. I love their speed and the annoyance factor, but at 100 points they just do not do enough. I am not sure how to play them next time. Perhaps a unit of 5 for pure throw-away distraction.
Subscribe to:
Posts (Atom)